M-BOX USER MANUAL
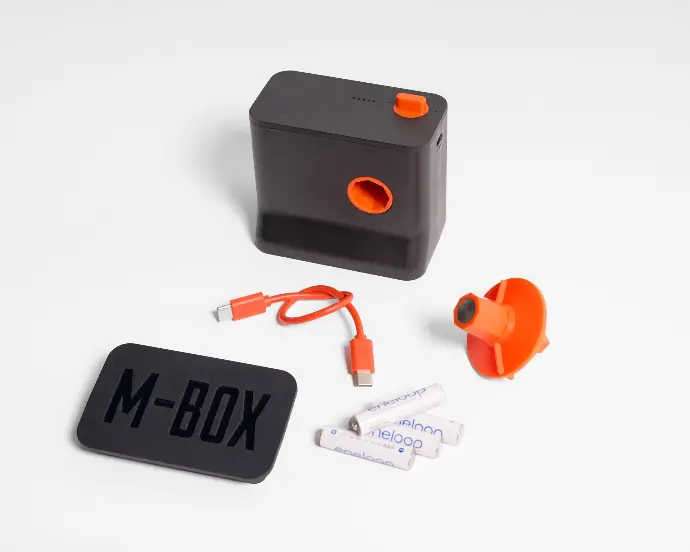
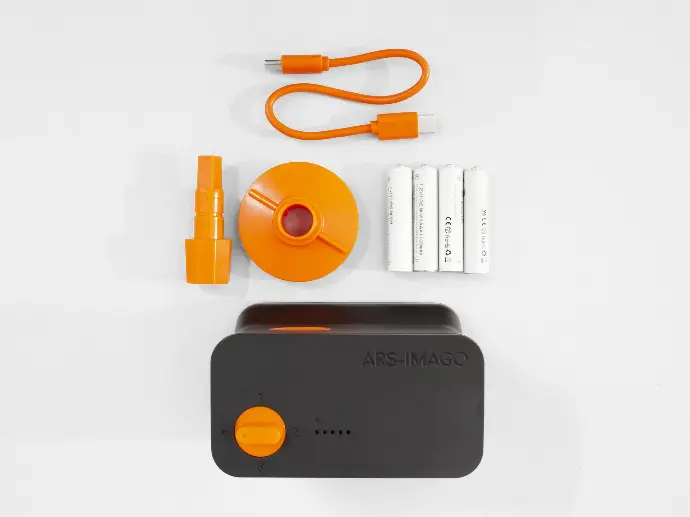
What's in the box
- The M-BOX motor itself
- USB-C charge cable
- Four rechargeable batteries (AAA)
- Silicone cap
- Crank disk + Magnetic crank pin
- (THE LAB-BOX TANK IS NOT INCLUDED IN THE BOX)
HOW TO BUILD IT
- Once you open the box, put all the pieces on the table.
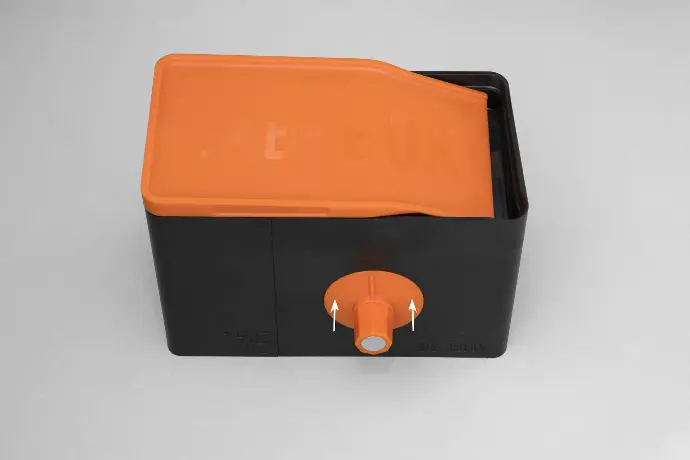
- Put the M-BOX module upside down and remove the silicon cap.
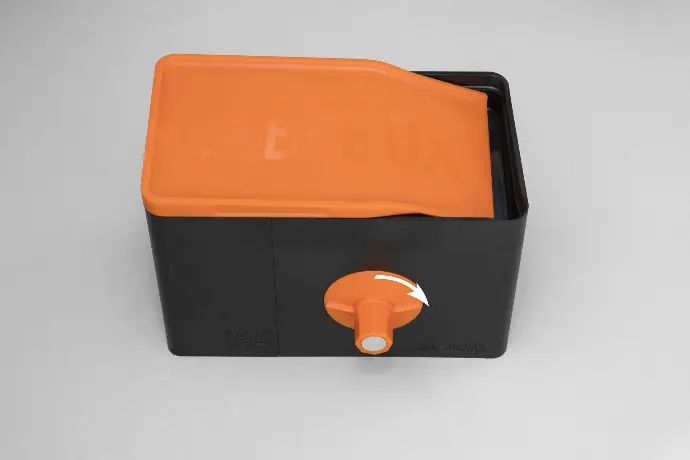
- Remove the battery cover and put the 4 batteries inside.
- Put back the orange cover and the silicon cap and you are ready to go.
HOW TO USE IT WITH THE LAB-BOX
- Take the crank and insert the pin with the magnet into the hole in the disc.
- Push the pin inwards with your fingers until you hear a “click.”
- Insert the crank into the Lab-Box with the grooves in a vertical position.
- The spiral should already be inserted inside.
- Turn the disc and crank to lock it in place, with the grooves horizontal.
- Remove the crank and insert the pin with the magnet into the hole in the disc.
- After manually loading the film, bring the M-BOX close to the LAB-BOX, aligning the crank pin with the motor housing then turn the pin until it fits perfectly.
- Push the M-BOX towards the Lab-Box until the pin is fully inserted into its housing: the internal magnet will make a small clicking sound.


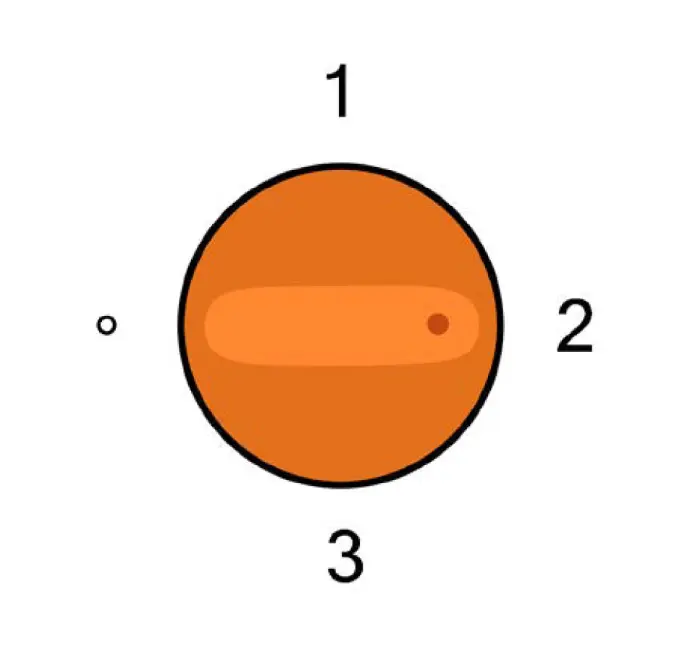
Program 1: 40 rpm. Continuous, slow rotation.
Suitable for fixing and washing phases.
Low energy consumption.
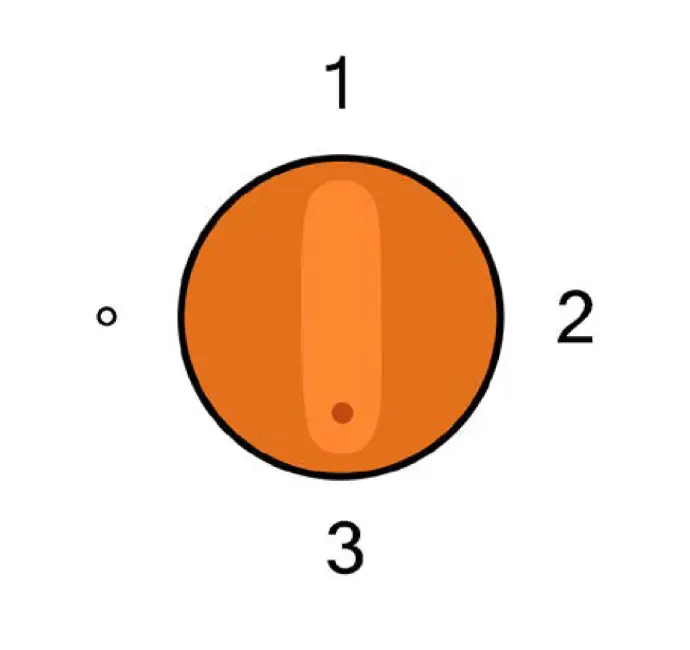
Program 2: 80 rpm. Intermittent, fast rotation with pauses.
Recommended for the development phase, guarantees the best and most even result.
The pauses last 4 seconds and occur every 16 seconds.
Program 3: 80 rpm. Continuous, fast rotation.
Suitable for fixing and washing or developing 35mm films.
Consumes more energy than the other programs.
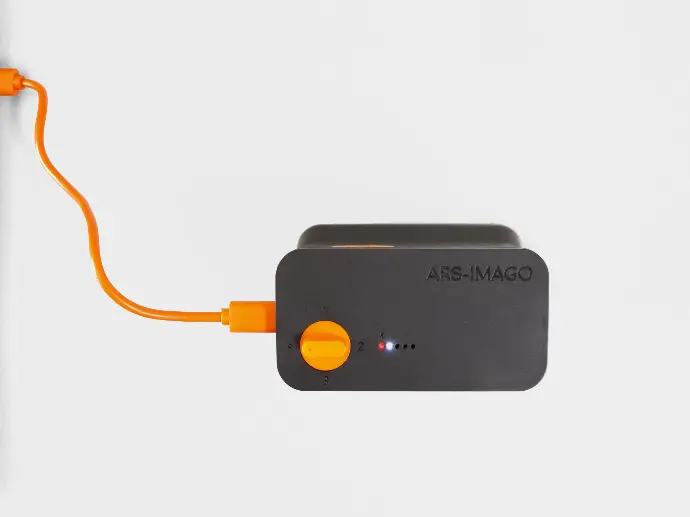
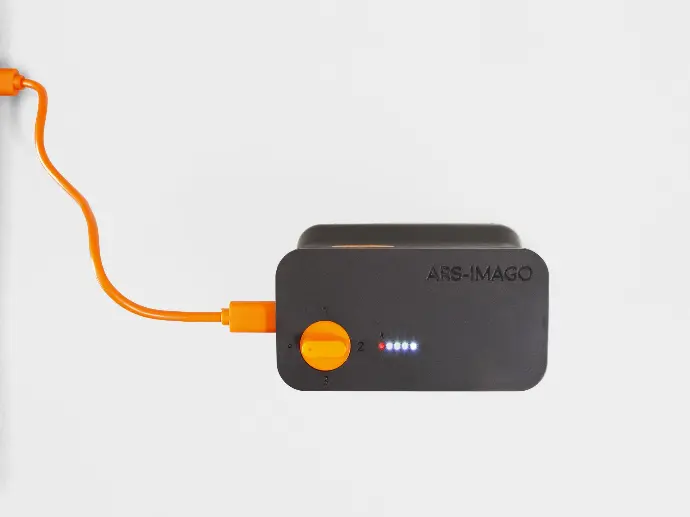
HOW TO CHECK THE BATTERY LEVEL
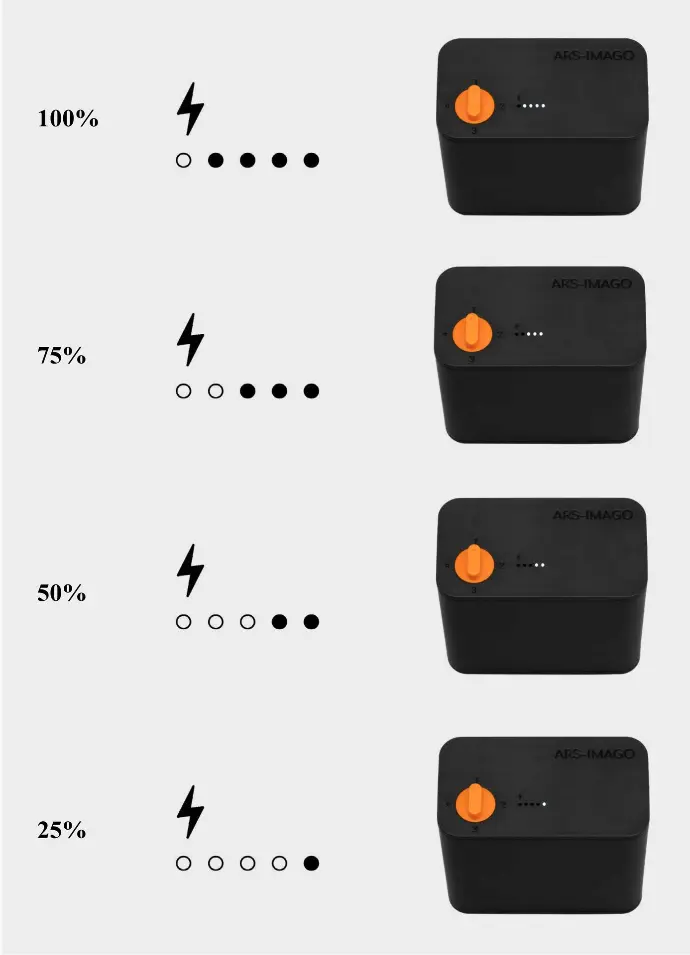
- To charge the M-BOX, insert the supplied USB-C cable into the port on the side of the motor.
- Once charging is complete, the red charging light will turn off.
- The M-BOX has a battery life of approximately 60-70 minutes at maximum speed after a full charge.
- Between 100% and 25% charge, there is a reduction in rotation speed (from 85-90 rpm to 60 rpm), which does not affect the results, however, as it always remains above the minimum rotation for uniform development.
- We recommend recharging the M-BOX for a few hours every 3 development processes, or in any case, as a precaution, using the motor when the charge is at least at 50%.


AGITATION GUIDE
(TESTO DI DIEGO) M-Box fits perfectly into the Ars-Imago product ecosystem for use in combination with our Lab-Box. With this new accessory, we aim to simplify every step of the process, allowing for greater precision and control over chemical processes. Agitating the film during development is essential for achieving uniform development, but agitation also affects certain characteristics of the developed negatives. The more agitation, the greater the development energy, i.e., for the same development time, there is slightly greater contrast, so in the case of continuous agitation throughout the treatment, the development time must be reduced by about 15% to compensate for the increase in contrast. During development, a particular effect is generated, known as the “edge effect” or “Mackie lines”: in practice, in the border area between a dark and a lighter area of the image, the edge tends to darken in the darker area and lighten in the lighter area, creating a more pronounced line between light and dark areas that emphasizes the feeling of sharpness (the effect is equivalent to contrast masking in digital photography). The edge effect is more pronounced when there is less agitation, so adopting an intermittent agitation pattern results in a slight increase in the feeling of sharpness in the images.

To install this Web App in your iPhone/iPad press
![]() and then Add to Home Screen.
and then Add to Home Screen.
